You invested $8,000 to $15,000 in artificial grass, expecting a maintenance-free lawn that looks great for years. Six months later, you’re staring at wrinkles, puddles that won’t drain, and grass that’s already matting down.
We see artificial grass gone wrong all the time. Homeowners call us for help after spending thousands of dollars on an installation that looked fine at first but fell apart within a year. Their contractor won’t return their calls.
The turf looks worse every month, and now they’re facing the choice between living with it or paying to fix someone else’s mistakes. The frustrating part is that these problems are almost always preventable.
After installing over 10,000 turf lawns across Texas and Florida, we’ve identified three failures that cause 90% of artificial grass problems. Knowing what goes wrong can help you avoid becoming another cautionary tale.
How to Avoid Artificial Grass Gone Wrong
- Proper sub-base preparation (three to four inches, compacted multiple times) prevents settling, wrinkles, and drainage problems.
- Infill of at least two pounds per square foot keeps blades standing and protects the backing.
- W-, S-, or C-shaped blades with reinforced spines resist matting far better than flat blades.
- Flow-through backing drains 2,900% faster than hole-punched backing.
- DIY “savings” often cost more when professional repairs become necessary.
- Ask installers specific questions about sub-base depth, product specs, and infill amounts.
- If an installer can’t answer technical questions or provide spec sheets, find someone else.
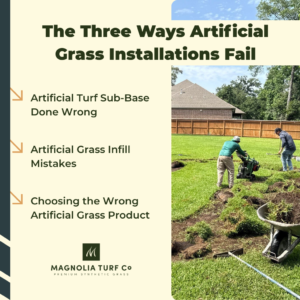
The Three Ways Artificial Grass Installations Fail
Problem 1: Artificial Turf Sub-Base Done Wrong
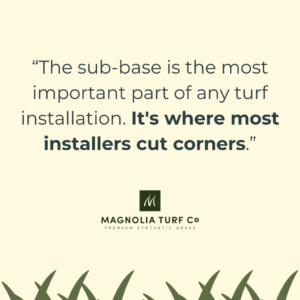
The sub-base is the most important part of any turf installation. It’s where most installers cut corners.
A proper sub-base requires three to four inches of decomposed granite or crushed limestone, compacted four to five times with a plate compactor. This creates a stable, well-draining base that keeps your turf looking flat and performing well for 15 years or more.
What happens when installers skip this step? They use one to two inches instead of three to four. They use crushed concrete or plain dirt. They don’t compact it properly.
The results show up fast. After the first rainstorm, you’ll see settling. The turf develops wrinkles and waves.
Low spots appear where water pools. Within a year or two, you’re looking at sinkholes and an uneven surface that only gets worse.
Why do installers cut corners here? Proper excavation and base prep takes time and costs money. Skipping it can save $2,000 to $4,000 on a job. But that “savings” comes straight out of your pocket when the installation fails.
Problem 2: Artificial Grass Infill Mistakes
This is probably the most common artificial grass mistake we see. Installers don’t put enough infill sand on top of the turf.
Infill serves multiple purposes. It keeps the blades standing upright. It protects the backing from UV damage. It adds weight that prevents shifting.
Without enough infill, the turf can’t perform the way it’s designed to. You need at least two pounds per square foot of infill sand, broomed into the turf fibers. Many installers use half that amount or skip it entirely.
The result? Blades won’t stand up straight. Foot traffic mats them down within months. After a few years, your turf looks flat and worn instead of lush and realistic.
Unlike sub-base problems, you can actually see this one coming if you know what to look for.
Problem 3: Choosing the Wrong Artificial Grass Product
Not all artificial turf is created equal. Many homeowners treat it like a commodity, assuming one product is pretty much like another. That’s a mistake.
Lower-quality products use flat blades without structural integrity. They look shiny and fake from day one, and they get worse. After minimal foot traffic, they lie down and look like confetti.
They’re often too short (under 1.5 inches) and too thin to hold up under real-world use.
Quality turf has W-, S-, or C-shaped blades with a reinforced spine. These shapes make the fibers more resilient. They bounce back after being stepped on instead of lying flat permanently.
Higher face weight (the fiber density) means better durability and a more realistic appearance that lasts.
Check the specs before you sign. If your installer can’t tell you the face weight, blade height, and blade shape of the product they’re using, that’s a red flag.
When Artificial Grass Shortcuts Catch Up With You
Poor artificial turf installations don’t fail all at once. They deteriorate over time, and each month makes the problem harder and more expensive to fix.
Immediate to short-term (first few months): Wrinkling and bunching appear if the turf wasn’t stretched properly or lacks sufficient infill. Weeds may sprout around the perimeter if the installer didn’t secure edges or skipped the weed barrier.
Medium-term (one to two years): Turf with flat blades or insufficient face weight starts matting down under regular traffic. An inadequate sub-base begins shifting and settling. Low spots and dips become more pronounced.
If the installer used hole-punched backing instead of flow-through backing, pet urine gets trapped and persistent odors develop.
In Texas and Florida, these problems accelerate. Extreme summer heat (100°F+ in Dallas, high humidity in Tampa) stresses lower-quality materials. Heavy rainfall events common in Houston and Sarasota expose drainage failures fast.
If your turf can’t drain 900 inches of water per hour, you’ll know after the first big storm.
Artificial Grass Features That Prevent Problems
Premium products cost more upfront, but they’re not premium for marketing reasons. They’re premium because they solve specific problems.
Blade technology: W-, S-, and C-shaped blades with a reinforced spine resist matting. Flat blades without structure will lie down and stay down. A blade height of 1.5 inches or taller looks more realistic and handles traffic better.
Backing systems: Flow-through backing drains 900 inches of liquid per hour. Traditional hole-punched backing drains at 30 inches per hour. That’s a 2,900% difference.
Flow-through backing means pet urine drains straight through instead of pooling on top of your sub-base and creating odor problems. This is why we recommend pet turf with flow-through backing for any home with dogs.
Antimicrobial protection: Microban coating helps fight bacteria buildup, which is important for pet owners. Without it, good drainage alone can’t prevent odor issues entirely.
UV protection: LusterGuard technology diffuses sunlight and prevents the plastic shine that makes cheap turf look fake. UV inhibitors prevent fading, which matters when your turf bakes in Texas sun six months a year.
Don’t take an installer’s word that their product is “high quality.” Ask for the spec sheet. If they can’t provide one, walk away.
DIY Artificial Grass: When Saving Money Costs More
We’ve seen plenty of DIY projects. Some turn out fine. Most don’t.
DIY can work on small areas with existing hard surfaces. Laying turf on a patio or concrete driveway is manageable if you’re handy. The turf goes down, you glue the edges, and you’re done.
But as soon as you’re doing your own sub-base work, everything changes. Excavating, grading, compacting, cutting around trees and beds, and making invisible seams take professional equipment and years of skill to get right.
The most common DIY failures we see:
- Visible seams look like a straight line down the middle of your yard. Proper seaming is a craft. It requires matching pile direction, using the right adhesive, and making cuts that disappear into the surrounding turf.
- Inadequate compaction comes from homeowners who don’t rent a plate compactor or don’t know how to use one properly. The sub-base shifts and settles.
- Blades that won’t stand up result from DIYers who don’t have a power broom to fluff the turf after installation.
DIY installation typically costs $3 to $7 per square foot for materials. Professional installation runs $7.10–$10.30 per square foot. That’s $2,000 to $4,000 in “savings” on a typical backyard.
But if the DIY installation fails and needs professional repair, Magnolia Turf’s formula is (Labor + Materials) × 2. A $300 repair becomes $600. A major fix requiring new base work can run $3,000 to $8,000.
Sometimes, the only option is complete removal and reinstallation, which means you’re paying for the job twice.
Questions to Ask Before Signing an Artificial Turf Contract
When you’re getting quotes, ask specific questions about the installation process. Vague answers are a red flag.
About the sub-base: “What depth of sub-base will you install, and what material do you use?” The answer: three to four inches of decomposed granite or crushed limestone.
About drainage: “Does the turf have flow-through backing or hole-punched backing?” Flow-through is far superior for pet owners.
About the product: “What’s the face weight? What’s the blade height? What shape are the blades?” A quality installer will answer these without hesitation.
About infill: “How much infill will you use per square foot?” The right answer: at least two pounds.
About the company: “How long have you been installing artificial turf? How many jobs have you completed? Is your crew in-house or subcontracted?”
Installing turf isn’t like laying carpet. It requires specialized skill and experience. A company with thousands of installations under its belt will do better work than one that’s learning on your project.
FAQ: Artificial Grass Problems and Solutions
What causes artificial grass to fail?
Most failures trace back to improper sub-base preparation, insufficient infill, or low-quality products. The sub-base is the base. Without three to four inches of properly compacted material, settling and drainage problems are inevitable.
How long should artificial grass last?
Quality turf with proper installation lasts 15 to 20 years. Our installations come with a [15-year warranty]. Poor installation or cheap products may fail in two to five years. The difference is almost entirely in the installation quality and product specifications.
Can failed artificial grass be repaired?
Sometimes. If the problem is insufficient infill, adding more can help. If seams are visible, they can sometimes be redone. But if the sub-base is inadequate, the only fix is removing the turf, redoing the base work, and reinstalling.
How much does it cost to fix artificial grass problems?
Repairs typically run $600 to $4,000, depending on the issue. Drainage problems requiring new base work cost $3,000 to $8,000. Complete reinstallation costs $8,000 to $15,000. Most people would have paid less to do it right the first time.
How can I check if my artificial grass was installed correctly?
Walk the perimeter and check for lifting edges. Look for wrinkles or bunching across the surface. Spray with a hose and watch the drainage.
Water should disappear within 60 seconds, not pool on top. Check seams from different angles. And if you notice persistent odors after cleaning, that’s a drainage problem.
Get Your Artificial Grass Done Right
Artificial grass is a big investment. The difference between an installation that looks great for 15 years and one that fails in two comes down to proper sub-base preparation, quality materials, and experienced installers who don’t take shortcuts.
If you’re considering artificial turf for your Texas or Florida home, call us today. We’ll answer your questions about the process. And if you’re already dealing with artificial grass gone wrong from another company, get a free estimate from us today. We’ll share what it would take to make it right.