Table of Contents
- What Is Professional Turf Installation?
- Who Needs Turf Installation Services?
- Professional Installation vs. DIY: Honest Comparison
- Understanding Installation Methods and Quality Standards
- Step-by-Step Installation Process
- Complete Cost Breakdown: Materials, Labor, and Hidden Expenses
- Texas and Florida Installation Considerations
- Common Installation Mistakes and How Professionals Avoid Them
- Frequently Asked Questions
- Get Your Free Installation Estimate
Introduction
Most turf installations fail because of what you never see: the base.
We’ve completed over 10,000 artificial turf installations across Texas and Florida. When we’re called to repair failing projects, the problem isn’t the turf itself. It’s what’s underneath… or more accurately, what’s not underneath.
Proper base preparation means three to four inches of crushed granite or limestone, compacted correctly. It provides drainage, stability, and the foundation that keeps your turf looking great for 15 years instead of five.
It also adds about $3–4 per square foot to the installation cost. That’s why companies skip it.
This guide breaks down everything you need to know about turf installation. Whether you’re considering professional installation or thinking about DIY, you’ll understand what proper installation looks like, what it actually costs, and why the difference between adequate and excellent installation matters more than most people realize.
We’ll cover professional standards from our 10,000+ installations, honest DIY guidance including common failures, transparent cost analysis, and specific considerations for Texas and Florida climates. By the end, you’ll know exactly what questions to ask and what standards to expect.
What Is Professional Turf Installation?
Professional turf installation is a complete transformation process that starts long before the turf gets unrolled.
The process begins with a site assessment. Experienced installers evaluate drainage patterns, soil composition, existing landscape features, and intended use. They identify potential problems before they become expensive fixes. This assessment determines base depth requirements, drainage solutions, and material specifications.
The critical difference between professional installation and shortcuts comes down to base preparation. Every Magnolia installation includes three to four inches of decomposed granite or crushed limestone. This isn’t optional. It’s the foundation that prevents settling, ensures proper drainage, and maintains a level surface for years.
Compare that to installations that skip base work entirely or use inadequate depth. They might look identical on installation day. Five years later, you’ll see depressions where the base settled, pooling water from inadequate drainage, and wrinkled turf from shifting substrate. The cost to fix these issues typically runs double the original installation price.
Professional installation also means:
- Proper excavation to appropriate depth, removing existing grass and roots completely
- Compaction to 85–95% using plate compactors, not just tamping by foot
- Precise cutting and seaming that makes joins virtually invisible
- Strategic infill application using the right material for your specific use case
- Final grooming that sets blade direction and appearance
The warranty difference shows the value of professional installation. At Magnolia, our 15-year material warranty, combined with our labor warranty, protects your entire investment.
Professional installation means both the turf and the work are guaranteed. DIY gets you the material warranty only, assuming you followed the manufacturer’s specifications exactly. When something goes wrong in year three, that distinction matters.
Who Needs Turf Installation Services?
Not every project requires professional installation. Some do-it-yourselfers succeed with smaller, simple projects. But understanding when professional installation makes sense protects your investment.
You likely need professional installation if:
Your project exceeds 500 square feet. The physical demands and complexity scale dramatically. What seems manageable at 200 square feet becomes exhausting at 1,000. Professional crews finish in one to two days what takes DIYers a week or more.
Your yard has drainage challenges. Standing water, clay soil, or areas that stay soggy after rain require engineered solutions. Improper drainage is the most common installation failure we fix.
Your property includes slopes or irregular terrain. Grading, compaction, and securing turf on slopes demand specific techniques and equipment. Mistakes lead to sliding turf and erosion problems.
You want seams that don’t show. Professional-grade seaming takes practice and precision. Visible seams are the most obvious sign of amateur installation. They also create failure points where edges lift over time.
You’re installing pet turf. Dogs and drainage require specific base preparation and infill choices. Getting this wrong means odor problems and expensive corrections.
DIY might work if:
- Your project is under 500 square feet.
- The area is flat with good natural drainage.
- You have basic landscaping experience.
- You own or can afford to rent proper equipment.
- You understand your physical limitations for hauling materials and compaction work.
The decision often comes down to risk tolerance. Professional installation costs more upfront but includes expertise, warranty, and accountability. DIY saves labor costs but transfers all risk to you.
Professional Installation vs. DIY: Honest Comparison
Let’s break down the real differences between professional installation and DIY, beyond just cost.
Timeline and Physical Demands
Professional installation: A 1,000 square foot residential project typically takes one to two days with a skilled crew. They arrive with proper equipment, materials staged, and a proven process. The physical work is intense but managed by experienced teams.
DIY installation: That same 1,000 square feet requires four to seven days for most homeowners, working six to eight hours per day. You’ll spend 30–40+ labor hours on excavation, base preparation, compaction, cutting, seaming, and finishing. The work is genuinely exhausting. Underestimate this at your own risk.
Quality Outcomes
Professional results:
- Seams that are virtually invisible, aligned with grain direction
- Consistently level surface from proper base compaction
- Strategic drainage that prevents pooling
- Professional-grade infill application for optimal blade support
- Final appearance that matches or exceeds showroom samples
DIY reality:
- Visible seams are common, even with careful cutting
- Uneven surfaces from inadequate or inconsistent compaction
- Drainage issues that aren’t apparent until the first heavy rain
- Over-applied or under-applied infill affecting appearance and performance
- Learning curve shows in final results, especially around edges and obstacles
Skill Requirements and Tools
Professional installers bring years of experience and specialized equipment. Plate compactors, seaming tools, precise cutting equipment, and infill spreaders. They’ve solved dozens of drainage challenges and know how to handle difficult terrain.
DIY requires you to learn on your project. You’ll need to rent or buy:
- Sod cutter or manual excavation tools
- Plate compactor (rental: $80–100/day)
- Professional-grade utility knives and replacement blades
- Seaming tape and adhesive
- Infill spreader
- Wheelbarrow, level, rake, and hand tools
The equipment costs alone run $500–800 for a weekend project, assuming rental. Many DIYers underestimate compaction requirements and either skip this step or do it inadequately.
Warranty and Accountability
With professional installation: Material warranty (15 years) plus labor warranty (one to five years typical). If something fails, you have recourse. At owner-operated companies like Magnolia, the installer stakes their personal reputation on the outcome. That accountability matters when you need service years after installation.
With DIY: Material warranty only, and only if you followed manufacturer specs exactly. If your base prep was inadequate or your seams fail, you own the problem. The cost to fix DIY mistakes averages double the original installation cost.
When Professional Installation Wins
Professional installation makes the most sense when:
- Project complexity exceeds your skill level
- Your time is valuable (40 labor hours has real cost)
- Long-term outcome matters more than short-term savings
- You want warranty coverage and accountability
- The project size makes DIY physically unrealistic
We’ve seen DIY projects succeed. They’re typically small (under 300 square feet), simple (flat, rectangular), and completed by homeowners with construction experience. Even then, the final result usually shows the learning curve.
Understanding Installation Methods and Quality Standards
The difference between turf that lasts 15 years and turf that fails in five comes down to installation methods most people never see.
Base Preparation: The Foundation That Matters
Excavation depth matters. Standard installations require removing three to four inches of existing soil and grass. This creates room for base material without raising the final grade noticeably. Some installers try to save time by installing over existing grass with minimal base. This fails.
Base material selection affects everything. We use crushed granite or limestone because it compacts well, drains efficiently, and stays stable under Texas heat and heavy use. Class II road base works similarly. Decomposed granite (DG) is excellent for residential installations.
The alternative is skipping proper base material entirely or using inadequate depth. You’ll see installations with just one inch of base, or worse, turf laid directly over existing soil. These installations always fail. They settle unevenly, creating depressions and waves. Drainage problems develop. The turf’s backing deteriorates faster from ground contact and moisture.
Compaction determines longevity. Base material must be compacted to 85–95% density using a plate compactor. This requires multiple passes, light watering between passes, and checking for soft spots. Most DIY failures come from inadequate compaction.
Hand tamping doesn’t work. Walking on the base doesn’t work. You need proper equipment and the knowledge to use it correctly. Under-compacted base will settle over time, creating uneven surfaces and drainage problems that only get worse.
Drainage Solutions
Proper drainage starts with slope. A 1–2% grade away from structures prevents water accumulation. On flat areas, this means carefully grading the base to create drainage paths.
Flow-through backing is essential. Quality turf includes perforated backing that allows water to drain through at 900 inches per hour or more. This matters in Texas and Florida, where afternoon thunderstorms dump inches of rain quickly.
But backing alone isn’t enough. The base must drain, too. Crushed granite or limestone provides interstitial space for water movement. In areas with clay soil or poor natural drainage, additional solutions may be needed: French drains, drainage channels, or perforated pipe systems.
We’ve repaired installations where drainage was ignored. Standing water creates multiple problems: odor (especially with pets), accelerated backing deterioration, and perfect conditions for mold growth.
Professional-Grade Seaming
Seaming is where professional installation shows most clearly. The goal is invisible joins where two pieces of turf meet.
The process requires precision:
- Turf must be laid with grain direction matching perfectly.
- Factory edges are trimmed to create clean, straight joins.
- Seaming tape is positioned underneath, centered on the join.
- Adhesive is applied evenly to the tape.
- Both edges are pressed into adhesive simultaneously.
- Nails are driven every four to six inches to secure while adhesive cures.
- Infill is worked into the seam area to hide any visible line.
Professional installers have done this hundreds of times. They know how to align grain direction, how much adhesive to apply, and how to nail without driving too deep (which creates depressions). They conceal seams so well you won’t spot them even when you’re looking.
DIY seaming almost always shows. The most common mistakes include edges that don’t align perfectly, visible gaps, overlapping grain direction, and nails driven too deep. Even small errors create permanent visible lines.
Quality Markers to Look For
Excellent installation shows these characteristics:
- Completely level surface with no waves or depressions
- Drainage that clears water within minutes of rain
- Seams that are invisible or nearly invisible
- Edges secured firmly with no lifting
- Blade direction consistent and upright
- Infill distributed evenly at proper depth
- Professional finish around obstacles, edges, and transitions
Red flags indicating problems:
- Visible seams or gaps between turf sections
- Uneven or soft areas when you walk the surface
- Water pooling that doesn’t drain within 30 minutes
- Edges that lift or curl
- Excessive shine (indicates insufficient infill or wrong material)
- Blades that lie flat instead of standing upright
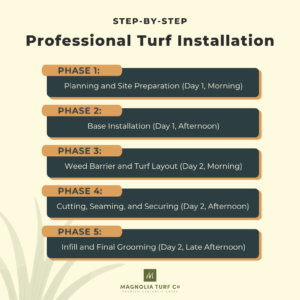
Step-by-Step Installation Process
Understanding each phase helps you evaluate professional work or tackle DIY installation with realistic expectations.
Phase 1: Planning and Site Preparation (Day 1, Morning)
Professional installation begins with precise site assessment and planning. The crew measures the area, identifies obstacles, plans seam locations to minimize visibility, and determines drainage requirements.
Site preparation includes:
- Removing existing grass, plants, and roots completely
- Excavating to appropriate depth (three to four inches minimum)
- Grading to establish proper slope for drainage
- Removing debris and rocks that could damage turf backing
This phase is physically demanding. For a 1,000 square foot area, excavation removes roughly 10–12 cubic yards of material. That’s multiple truckloads requiring disposal.
Phase 2: Base Installation (Day 1, Afternoon)
The base layer determines everything that comes after. We install three to four inches of crushed granite or limestone in layers.
Process:
- Spread first layer of base material (1.5–2 inches)
- Compact thoroughly using plate compactor, multiple passes
- Check for proper slope and drainage paths
- Spread second layer to achieve final depth
- Compact again to 85–95% density
- Final grading and leveling
- Light water spray to help compaction settle
- Allow base to settle overnight before turf installation
Proper compaction is critical. The base must feel solid underfoot with no soft spots. Professional installers check compaction across the entire area, paying special attention to edges and corners where settling problems often develop.
Phase 3: Weed Barrier and Turf Layout (Day 2, Morning)
Geotextile weed barrier fabric goes down over the compacted base. This prevents weed growth without impeding drainage.
Turf layout requires planning:
- Turf rolls are positioned to minimize seams.
- Grain direction is matched across the entire installation.
- Seam locations are planned to be least visible.
- Extra material is left at edges for final trimming.
Professional installers know to let turf relax for 30–60 minutes before cutting. The material needs to release stress from being rolled. Cutting immediately leads to measurement errors.
Phase 4: Cutting, Seaming, and Securing (Day 2, Afternoon)
This is where professional expertise matters most. Turf is cut to fit precisely around obstacles, along edges, and where pieces join.
Seaming process:
- Factory edges are trimmed for clean joins.
- Seaming tape (typically 12–16 inches wide) is positioned underneath.
- Specialized adhesive is applied evenly to tape.
- Both turf edges are pressed into adhesive simultaneously.
- Nails are driven every four to six inches along seam.
- Seam is inspected and adjusted before adhesive cures.
Securing around perimeter:
- Edges are secured with nails or staples every six to eight inches.
- Special attention to areas prone to lifting (near walkways, slopes).
- Final trimming for precise fit against hardscape and obstacles.
Phase 5: Infill and Final Grooming (Day 2, Late Afternoon)
Infill serves multiple purposes: adds weight to prevent movement, helps drainage, supports blades upright, and creates realistic appearance.
Infill application:
- Two to three pounds per square foot is standard.
- Applied using drop spreader or broadcast spreader.
- Worked into turf using power broom or stiff push broom.
- Multiple passes ensure even distribution.
- Blades are brushed upright.
- Edges are cleaned of excess infill.
The right infill material depends on use case. Silica sand works for basic residential. Envirofill with Microban antimicrobial coating is essential for pet areas.
Final grooming:
- Power brush sets blade direction.
- Edges are trimmed precisely.
- Any visible seams get additional infill worked in.
- Final inspection for high-quality and coverage.
Professional crews do a complete walkthrough, checking for any soft spots, drainage issues, or areas needing adjustment.
Complete Cost Breakdown: Materials, Labor and Hidden Expenses
Let’s talk about what high-quality artificial turf installation actually costs. You’ll find cheaper options. You’ll also find installations that fail in five years instead of lasting 15.
Professional Installation Costs (2025)
Full-service professional installation ranges from $12–22 per square foot for residential projects, including all materials and labor. Texas installations typically run $10–16 per square foot. Florida costs run slightly higher at $11–17 per square foot.
What’s included at this price point:
- Complete site assessment and planning
- Excavation and material removal
- 3–4 inches of proper base material (crushed granite or limestone)
- Professional compaction to spec
- Geotextile weed barrier
- Premium turf with flow-through backing and antimicrobial properties
- Expert cutting and seaming
- Quality infill material (2–3 lbs per square foot)
- Professional grooming and finishing
- Material warranty (15 years) plus labor warranty (1–5 years)
Project size examples:
- 500 sq ft: $6,000–9,500 typical range
- 1,000 sq ft: $8,000–16,500 typical range
- 2,000 sq ft: $16,000–32,000+ typical range
The lower end of these ranges typically involves simpler installations: flat terrain, good drainage, rectangular shapes. Higher costs reflect complexity: slopes, drainage challenges, custom features, premium turf selections.
We typically quote $13–15 per square foot for standard residential installations. That includes proper base preparation, premium materials with flow-through backing and Microban coating, and professional installation by experienced crews. We don’t skip steps to hit a price point.
DIY Material Costs
If you’re considering DIY installation, understand the real material costs before you commit.
Turf material by quality tier:
- Budget polypropylene: $1.90–6.75 per sq ft (shows wear quickly)
- Mid-grade polyethylene: $2–4 per sq ft (standard residential)
- Premium nylon: $5–10+ per sq ft (high durability, best appearance)
Base materials (1,000 sq ft project needing 3–4 inches depth):
- Crushed granite or limestone: $300–600 delivered
- Decomposed granite: $250–500 delivered
- Class II road base: $200–450 delivered
Additional materials:
- Geotextile weed barrier: $0.30–0.80 per sq ft ($300–800 for 1,000 sq ft)
- Seaming tape (25-foot rolls): $13–35 per roll
- Turf adhesive: $40–80 per project
- Infill material: $0.50–1.50 per sq ft ($500–1,500 for 1,000 sq ft)
- Nails/stakes: $50–100
- Edge restraint/bender board: $1–3 per linear foot
Tool costs (rental or purchase):
- Sod cutter rental: $80–120 per day
- Plate compactor rental: $80–100 per day
- Wheelbarrow, shovels, rake: $150–250 (if purchasing)
- Professional utility knives and blades: $30–50
- Power broom (optional): $150–300 rental
Total DIY cost estimate for 1,000 sq ft:
- Materials: $3,500–10,800 depending on turf quality
- Tools: $500–800 (rentals and purchases)
- Total: $4,000–11,600
That’s for materials and tools only. It doesn’t include the 30–40+ labor hours required, disposal fees for excavated material, or the cost to fix mistakes.
Hidden Costs Nobody Mentions
Disposal fees: Excavating 1,000 square feet generates 10–15 cubic yards of material. Disposal costs run $50–250 depending on location and material type. Some areas require special permits for soil removal.
Permits: Required in some Texas and Florida municipalities. Costs range from $0–150 depending on project size and location. HOA approval may be required but doesn’t typically involve fees.
Tool rental adds up: If your project takes 4–5 days instead of the planned 2, rental costs double. That plate compactor at $90/day becomes a $450 expense instead of $180.
Mistake correction: The formula for fixing installation errors is (Labor + Materials) × 2. A seam that fails and needs re-doing costs double the original installation cost for that section. Inadequate base that needs to be removed and redone means paying twice for materials and labor.
We’ve fixed DIY installations where the correction cost exceeded what professional installation would have cost originally. The most expensive DIY mistake is discovering drainage problems after the turf is installed. Fixing that requires removing turf, correcting base slope, reinstalling.
When DIY Becomes More Expensive
DIY costs exceed professional installation when:
You choose cheaper turf to save money upfront, but it shows wear in 3–5 years requiring replacement. The savings of $1–2 per square foot initially means $3,000–6,000 in replacement costs 5 years later.
Inadequate compaction leads to settling and depression. Fixing this requires lifting turf, adding and compacting base, reinstalling. Cost: typically 150–200% of the original DIY project cost.
Poor drainage creates ongoing problems. The “fix” involves major rework: remove turf, regrade base, possibly add drainage systems, reinstall. Professional correction typically costs more than professional installation would have cost initially.
Visible seams and poor finishing reduce property value and curb appeal. While not a direct cost, the impact on home value can exceed the installation savings.
The question isn’t whether DIY costs less initially. It’s whether DIY saves money or just defers and multiplies the expense.
Ready to get accurate pricing for your project? After reviewing the costs and complexity, many homeowners choose professional installation for peace of mind. We provide transparent estimates with no pressure. Contact us for your free consultation and we’ll help you understand exactly what your project requires.

Texas and Florida Installation Considerations
Installing artificial turf in Texas and Florida requires specific considerations for climate, soil, and local requirements. We’ve completed thousands of installations across these markets.
Climate-Specific Challenges
Texas heat: Summer temperatures regularly exceed 100°F. Turf surface temperatures can reach 160°F in direct sun. This demands UV-resistant turf with heat-reflective technology. Premium products include UV inhibitors that prevent fading and degradation. Lower quality turf shows color loss and fiber breakdown within 5 years under Texas sun.
The solution is proper material selection and installation technique. We use turf with built-in UV protection rated for 15+ years in extreme conditions. Light-colored infill helps reduce surface temperature.
Florida humidity: High humidity combined with afternoon thunderstorms creates perfect conditions for drainage problems and organic growth. Flow-through backing that handles 900 inches per hour drainage is essential. Antimicrobial treatments prevent mold and mildew growth.
Base material selection matters. Crushed limestone drains faster than decomposed granite in high-moisture environments. Proper slope design is critical because Florida’s flat terrain doesn’t provide natural drainage paths.
Drainage Requirements
Heavy rain regions: Dallas and Houston can receive 2–4 inches in a single afternoon storm. Tampa and Sarasota face similar challenges during summer months. Inadequate drainage means standing water that doesn’t clear for hours or days.
Professional drainage solutions include:
- Base slope of 1–2% minimum away from structures
- Crushed limestone base for faster water movement
- Perforated drain pipe in areas with poor natural drainage
- Proper compaction that maintains drainage channels
Clay soil (common in Dallas and Houston areas) requires enhanced base preparation. We typically use thicker base layers (4 inches vs. 3 inches) and ensure proper compaction to prevent drainage impediment.
Sandy soil (common in Florida and some Texas markets) drains naturally but requires different base approach. The base must provide stability without impeding the excellent natural drainage.
Soil Type Variations
Texas clay soil challenges:
- Expands and contracts with moisture changes
- Poor natural drainage
- Can crack during extreme heat
- Requires robust base preparation to prevent turf movement
Our solution: 4-inch crushed limestone base, compacted in layers, with additional attention to edges where clay movement is most likely to affect turf position.
Florida sandy soil:
- Excellent drainage naturally
- Less stable for base compaction
- Can shift during heavy rain if not properly prepared
- Requires different compaction approach
For sandy soil, we often use 3-inch decomposed granite base with extra compaction passes. The goal is stability without compromising the natural drainage advantage.
Regional Permit and HOA Requirements
Texas major cities:
- Dallas: Permits typically not required for residential turf installation under 1,000 sq ft; check with specific municipality
- Houston: Similar approach; some HOAs have aesthetic guidelines
- Austin: Growing environmental focus means some neighborhoods have specific guidelines
- San Antonio: Generally permissive; HOA requirements vary by neighborhood
Florida markets:
- Tampa: Some areas require permits for larger installations; HOA approval common in many neighborhoods
- Sarasota: Similar to Tampa; coastal communities may have additional environmental guidelines
The key is checking with your specific HOA and municipality before starting. Installation that doesn’t comply with HOA guidelines can result in expensive removal requirements.
Austin and San Antonio Specific Notes
We’ve seen particular success in Austin with environmentally-conscious homeowners who appreciate the water conservation benefits. Austin’s drought history makes artificial turf an attractive alternative. The city’s progressive environmental stance means PFAS-free products resonate strongly.
San Antonio’s intense summer heat and water usage restrictions make turf installation increasingly popular. The market has expanded rapidly as water costs rise and natural grass maintenance becomes more challenging.
Common Installation Mistakes and How Professionals Avoid Them
We’ve repaired hundreds of failing installations. The same mistakes show up repeatedly. Understanding these errors helps you avoid them in DIY projects or recognize high-quality in professional work.
Inadequate Base Depth
The mistake: Installing turf with 1–2 inches of base material, or worse, laying turf directly over soil.
Why it fails: Insufficient base depth leads to settling, creating depressions and waves in the turf surface. Drainage suffers. The turf backing makes direct contact with soil, accelerating degradation. Within 2–3 years, the installation looks terrible.
How professionals prevent this: We excavate 3–4 inches and fill with proper base material. The base is the foundation. Skipping this step to save $3 per square foot costs $10–15 per square foot to fix later.
Poor Compaction
The mistake: Inadequate compaction of base material, often because DIYers don’t rent proper equipment or don’t understand compaction requirements.
Why it fails: Under-compacted base settles over time. You’ll see depressions, uneven surfaces, and areas that feel soft underfoot. Water pools in the depressions. The turf develops wrinkles as the base shifts.
How professionals prevent this: Multiple passes with a plate compactor, checking for soft spots, light watering between passes to aid compaction. The base must feel solid and consistent across the entire installation area. Professional installers know what proper compaction feels like.
Visible Seams
The mistake: Poor seaming technique that results in obvious lines where turf pieces meet. This includes misaligned grain direction, gaps between edges, overlapping material, or nails driven too deep creating depressions along seams.
Why it fails: Visible seams look amateurish and create permanent visual lines. They also represent failure points. Poorly secured seams lift over time, especially at edges. Water infiltration at seam lines accelerates backing deterioration.
How professionals prevent this: Grain direction is matched carefully. Factory edges are trimmed for perfectly straight joins. Seaming tape and adhesive are applied correctly. Nails are driven to proper depth (flush, not deeper). Infill is worked carefully into seam areas to hide any visible line. The result is seams you can’t spot even when looking for them.
Drainage Failures
The mistake: Installing turf without establishing proper slope or drainage paths. Flat installations with no drainage consideration.
Why it fails: Water pools on the surface after rain. This creates multiple problems: odor (especially with pets), extended dry time, potential backing damage, mold growth. Standing water is one of the most common complaints we hear about failed installations.
How professionals prevent this: Site assessment identifies drainage challenges before installation starts. Base is graded to create 1–2% slope away from structures. Flow-through backing is specified. In challenging situations, we install French drains or perforated pipe systems. The goal is water clearing within minutes of rain stopping.
Infill Problems
The mistake: Using wrong infill type for the application, applying too little or too much, or distributing unevenly.
Why it fails: Insufficient infill means blades lie flat instead of standing upright. The turf looks matted and unnatural. Too much infill creates hard surface and unnatural appearance. Wrong infill type (like non-antimicrobial material in pet areas) leads to odor problems.
How professionals prevent this: We specify infill type based on use case. Pet turf gets Envirofill with Microban antimicrobial coating. Residential turf uses silica sand or specialized infills. Application uses proper equipment (drop spreader or broadcast spreader) for even distribution. Power brooming works infill into turf at correct depth.
Learn about turf for households with pets.
Edge Securing Failures
The mistake: Inadequate securing around perimeter, especially near walkways, driveways, and slopes.
Why it fails: Edges lift and curl, creating tripping hazards and allowing weeds to grow underneath. The visual impact is immediate and the problem worsens over time.
How professionals prevent this: Nails or stakes every 6–8 inches around the entire perimeter. Extra attention to high-traffic areas and locations prone to lifting. Edge restraint or bender board used where appropriate. The edges are the most visible part of installation. They must be perfect.
Cutting Errors
The mistake: Cutting turf immediately after unrolling, resulting in inaccurate measurements and poor fit around obstacles.
Why it fails: Turf material relaxes after being unrolled. Cutting immediately means measurements are off once the material settles. This creates gaps, overlaps, and poor fit around curves and obstacles.
How professionals prevent this: Turf relaxes for 30–60 minutes before any cutting. Measurements are double-checked. Cuts around obstacles are made carefully using proper technique. Factory edges are trimmed for seaming rather than used as-is.
The Cost of Mistakes
Remember the correction formula: (Labor + Materials) × 2.
Fixing a base preparation error on a 1,000 square foot installation means removing turf, correcting base, reinstalling. If the original DIY project cost $7,000 in materials and labor, the correction costs $12,000–15,000.
This is why professional installation makes economic sense for most projects. The cost difference between adequate DIY and professional installation is typically $3,000–5,000 for a standard residential project. But the correction cost for DIY failures runs $8,000–15,000.
Frequently Asked Questions
How long does professional turf installation take?
Standard residential projects (1,000 square feet or less) typically take 1–2 days with a professional crew. Day 1 covers site prep, excavation, and base installation. Day 2 handles turf layout, cutting, seaming, infill, and finishing. Larger or more complex projects may require 3–5 days.
DIY installations take considerably longer. That same 1,000 square foot project requires 4–7 days for most homeowners working 6–8 hours daily. The physical demands and learning curve add days to the timeline.
Can I install artificial turf myself?
You can, but success rates vary dramatically based on project size and complexity. DIY works best for:
- Projects under 500 square feet
- Flat terrain with good drainage
- Simple rectangular shapes
- Homeowners with construction or landscaping experience
Projects over 1,000 square feet, those with drainage challenges, slopes, or complex shapes typically exceed DIY capabilities. The most common DIY failures involve inadequate base preparation, poor drainage design, and visible seams.
What’s the most important part of turf installation?
Base preparation. Everything else depends on this foundation. Proper base prep means 3–4 inches of crushed granite or limestone, compacted to 85–95% density. This creates drainage, stability, and the level surface that maintains turf appearance for 15+ years.
We’ve repaired hundreds of failing installations. Almost every failure traces back to inadequate base preparation. Companies skip this step because it’s expensive and time-consuming. That’s exactly why you can’t skip it.
How much does professional turf installation cost?
Professional installation in Texas and Florida typically ranges from $10–22 per square foot, all-inclusive. Texas installations average $10–16 per square foot. Florida runs $11–17 per square foot. These prices include proper base preparation, premium materials, professional installation, and warranty coverage.
Budget $6,000–9,500 for a 500 square foot project, $8,000–16,500 for 1,000 square feet, and $16,000–32,000+ for 2,000 square feet. Final cost depends on project complexity, terrain, drainage requirements, and material selection.
What happens if drainage isn’t installed correctly?
Drainage failures create multiple problems. Water pools on the surface after rain, sometimes taking hours or days to clear. This leads to odor issues (especially in pet areas), extended drying time, potential backing damage, and ideal conditions for mold growth.
Correcting drainage problems is expensive. It requires removing turf, regrading base to create proper slope, potentially installing drainage systems, then reinstalling turf. The correction typically costs more than proper installation would have cost initially.
Do I need a permit to install artificial turf?
Requirements vary by municipality and HOA. In Texas, most residential installations under 1,000 square feet don’t require permits, though you should verify with your specific city. Florida has similar general guidelines, but some areas require permits for larger installations.
HOA approval is more commonly required. Many neighborhoods have aesthetic guidelines about turf type, color, and installation location. Check with your HOA before starting to avoid expensive removal requirements later.
How long does artificial turf last?
Quality turf with proper installation lasts 15–20 years in Texas and Florida climates. This requires UV-resistant materials with built-in inhibitors and professional installation with adequate base preparation.
Budget turf or poor installation cuts lifespan by years. We see cheaper products showing obvious wear in 5–7 years. Installations with inadequate base prep often fail within 5 years, requiring complete replacement.
The 15-year lifespan assumes proper maintenance: regular brushing, debris removal, occasional rinsing. Pet turf may require more frequent grooming to maintain appearance.
What’s the difference between good and bad turf installation?
Good installation is invisible. The surface is perfectly level with no waves or depressions. Seams are hidden or nearly invisible. Drainage clears water within minutes. Edges are secure with no lifting. Blades stand upright naturally.
Bad installation shows itself immediately or develops problems quickly. Common signs: visible seams, uneven surface, water pooling, edges that lift, blades that mat down, soft spots when walking the surface. These issues indicate inadequate base prep, poor compaction, or amateur seaming technique.
Can artificial turf be installed over concrete?
Yes, but it requires different preparation than soil installation. The concrete must be clean, level, and have proper drainage slope. A shock pad underlayment is recommended for comfort. Turf is secured using adhesive rather than nails.
Concrete installations are common for patios, pool decks, and balconies. The key is ensuring drainage. Water must be able to flow off the concrete surface, not pool on the turf. Professional installation is strongly recommended for concrete applications.
Get Your Free Installation Estimate
After 10,000+ installations across Texas and Florida, we understand what high-quality turf installation requires. Proper base preparation. Premium materials with technology that matters. Expert installation by experienced crews. And warranty coverage that protects your investment.
We’re not the cheapest option. We’re the right one.
Every Magnolia installation includes 3–4 inches of crushed granite or limestone base, compacted correctly. Premium turf with flow-through backing that drains 900 inches per hour, LusterGuard technology for superior realism, and Microban antimicrobial coating for cleanliness. PFAS-free materials for your family’s safety. Professional seaming that makes joins virtually invisible. And finishing that sets the standard for what high-quality looks like.
Get your free installation estimate today. We’ll assess your property, discuss your specific needs, and provide transparent pricing with no pressure. You’ll understand exactly what you’re getting and why it matters.
We’d rather help you make the right decision than make the wrong sale. Whether you’re ready to move forward or still deciding between DIY and professional installation, we’re here to answer your questions honestly.
Contact Magnolia Turf for a free consultation and installation estimate. Call us or request a free estimate online. Serving Dallas, Houston, Austin, San Antonio, Tampa, and Sarasota.
Free Resources
Planning Your Project:
- Artificial Turf Cost Calculator — estimate your project investment
- Turf Landscape Guide — choosing the right product for your needs
- Pet Turf Solutions — specialized installations for dog owners
- Frequently asked questions — answers to common concerns
Installation Information:
- Drainage Design Guide — preventing water pooling and problems
- Infill Selection Guide — choosing the right material
Local Market Guides:
- Dallas Turf Installation — local considerations and services
- Houston Artificial Grass — climate-specific guidance
- Tampa Turf Services — Florida installation expertise